
Scheduler Settings
Here you can see some of the settings of the scheduler in the “Module Installer”.
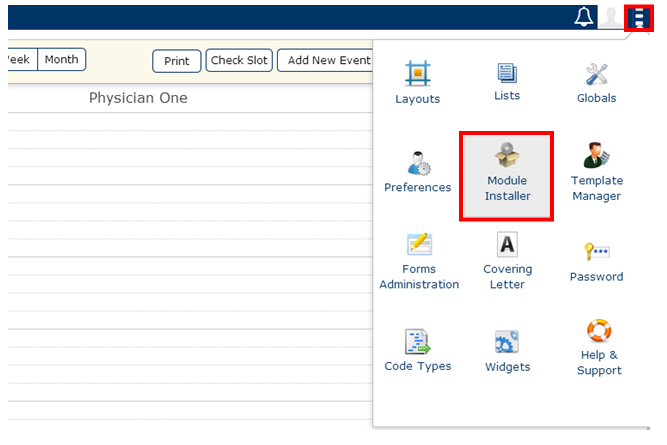
Go into the settings of the scheduler by clicking on the settings of the scheduler section
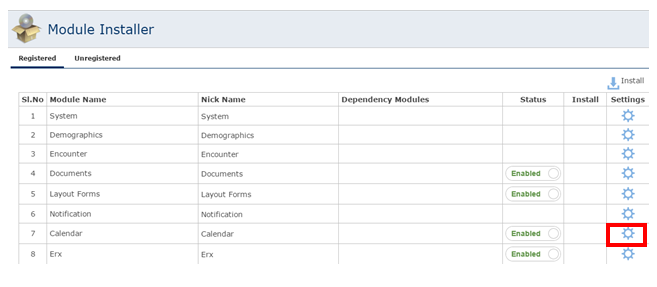
Clicking on the settings section, you get to the screen where various settings of the scheduler can be accessed.
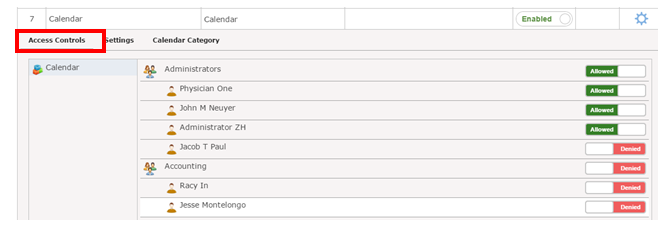
In the access control area selected above, select the users for which you want to activate the scheduler.
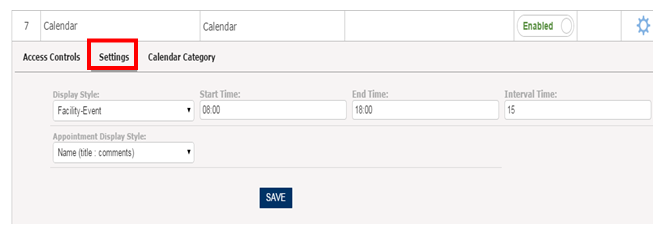
Under “Settings” shown above, choose from the following settings
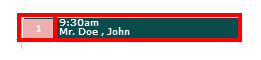
Display Style: This will decide whether you want the Facility color to appear first and the category color to appear second or vice versa.
Start Time: This will decide the time at which the scheduler will start.
End Time: This will decide the time at which the scheduler will end.
Interval Time: This will decide the interval shown on the scheduler screen.
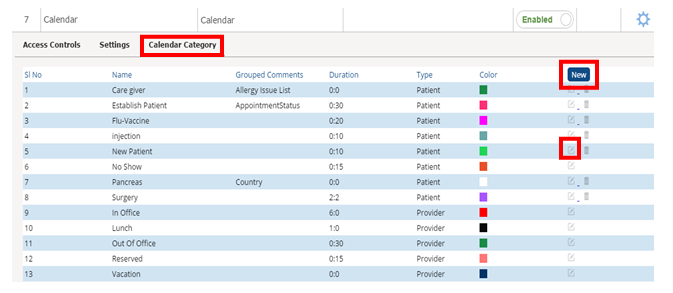
Clicking on the “Edit” (Green Pen) button, you can edit the details of a present category or add a new category by clicking the “New” button shown above.
To edit or create a new category, give the following details

Name: This is the name of the category
Color: Here you select the color of the category that should appear on the scheduler.
Description: Is any comment associated with the category.
All Day: To set whether this is all day event or not.
Duration: Here you can set the default duration of the appointment.
Type: Here you can set whether the category is associated to a provider or a patient.